Using Digital Frames at Real Estate Open Houses
How real estate agents use digital picture frames at open houses to display listing photos, neighborhood highlights, and floor plans.
Real estate agents are always looking for ways to make an open house stand out. Printed flyers get tossed. Laptop slideshows look unprofessional. A digital picture frame on the kitchen counter or entryway table is a polished, hands-free way to show off a property.
Here is how to use a digital frame at your next open house and which frames work best for agents.
What to Display
A digital frame can do more than just show listing photos. Think of it as a silent salesperson that runs on loop. Here are the best things to display:
- Professional listing photos of every room
- Aerial or drone shots of the property and yard
- Neighborhood highlights: parks, schools, shopping, dining
- Floor plans and room dimensions
- Before and after renovation photos
- Local market data slides (average sale price, days on market)
- Agent contact info and branding
Why Not Just Use a Laptop?
A laptop sitting open on a table looks like you left your computer behind. It invites people to touch the keyboard. It can show notifications or go to sleep. And someone might bump it off the table.
A digital frame looks intentional. It blends into the staging like a piece of decor. Visitors glance at it as they walk through the room. The photos cycle on their own. No one needs to press play or touch anything.
No WiFi? No Problem
Many listings do not have active internet service. That rules out WiFi-only frames. Instead, use a frame with a USB port or SD card slot. Load your photos onto a USB drive or SD card, plug it into the frame, and you are ready to go. No internet needed.
Frames that work well without WiFi include the Aluratek 10 and many budget frames with SD card slots. They sit under $100 and work well for this use case.
Best Frame Size for Open Houses
A 10-inch frame works well on a kitchen counter or side table. It is big enough to catch attention but small enough to carry in your bag. If you want a bigger impact, a 15-inch frame on a mantel or entryway table commands more attention.
For wall displays, a 15-inch frame like the Aura Walden makes a strong impression. One catch for open houses: it needs WiFi to load photos. Load it at the office first, or stay with a USB frame if the house has no internet.
What to Put on the Drive
Eight slides is about right. Fewer and it loops too fast, more and people stop watching before it comes round again. This order works because it matches how somebody walks a house:
- Hero exterior, the shot that made them book the viewing
- Kitchen
- Living room
- Primary bedroom
- The one feature this house has and the others do not
- Floor plan
- Neighbourhood or a nearby landmark
- Your name, photo and phone number
Put the agent slide last, not first. By slide eight they have decided whether they like the house, and that is the moment to tell them who to call.
Getting the Files Ready
Ten minutes here saves a bad slideshow on the day.
- Shoot and export landscape. Frames are wider than they are tall. A portrait photo gets black bars down both sides and wastes half the screen.
- Resize to the frame resolution. Most of these panels are 1280 by 800. A 40-megapixel file does not look better on them, it just takes longer to load.
- Save as JPEG. It is the safe default. Some frames handle PNG or HEIC and some do not, so check the manual before you rely on anything else.
- Number the filenames. Most frames play in filename order, so
01-exterior.jpgthrough08-agent.jpggives you the running order for free. - One folder per listing. Keep them on the drive and you can reuse the same stick next weekend.
- Copy the folder twice. Drives fail and get left in laptops. A spare in the bag costs almost nothing.
Running More Than One Room
Do not try to sync frames. There is no reliable way to keep several consumer frames playing in step, and it does not matter, because nobody sees two rooms at once. Give each room its own drive and its own short loop:
- Entry: hero exterior, price, your contact slide
- Kitchen: kitchen, dining, neighbourhood
- Living room: floor plan, recent work, the feature slide
Duplicated drives are easier than synchronised devices, cheaper than extra Wi-Fi hardware, and they keep working when the house has no internet at all.
Setting Up for an Open House
Preparation is key. Here is a simple process:
- Take professional listing photos and export them at the frame's native resolution
- Create 3 to 5 slides with text: agent info, price, key features, neighborhood stats
- Load everything onto a USB drive or SD card
- Set the slideshow speed to 8 to 10 seconds per photo
- Place the frame where visitors will naturally see it: entry table, kitchen counter, or living room mantel
- Plug it in 30 minutes before the open house starts to make sure everything looks right
Photo Tips for Maximum Impact
Use landscape orientation for all photos. Digital frames are wider than they are tall. Portrait photos will have black bars on the sides and look awkward.
Use high-resolution images. A blurry photo on a digital frame looks worse than no photo at all. Export at the frame's native resolution or higher. Most 10-inch frames display at 1280 by 800 pixels. Check our resolution guide for more details.
Keep text slides simple. Big font, few words. The visitor is glancing, not reading a brochure. "3 Bed / 2 Bath / 1,800 sqft" is perfect. A paragraph of description is too much.
Using Multiple Frames
For larger properties, put a frame in two or three rooms. Each one shows different content. The entry frame shows listing photos and agent info. The kitchen frame shows neighborhood highlights and schools. The living room frame shows renovation photos and floor plans.
Budget frames keep the cost of three displays low. And you reuse the frames at every open house. Just swap the USB drive.
After the Open House
Pack up the frame and bring it to your next showing. Since all the photos are on a USB drive, swapping listings is fast. Create one USB drive per listing. Label each drive with the property address. Walk into the next open house, plug in the drive, and the frame is ready.
Best Frames for Real Estate Agents
Budget pick: Aluratek 10. USB and SD card support, no WiFi needed, under $100. Buy two or three for multi-room setups.
Mid-range pick: Any 10-inch Frameo frame. Touchscreen lets visitors interact if you want. USB support for no-WiFi locations.
Second USB pick: Dragon Touch Classic 10. Also runs straight from a USB stick or SD card, so it works in a house with no internet. Buy a second one for a two-room setup. We do not have a large offline frame to recommend right now. The big frames we track all need WiFi.
The Bottom Line
A digital frame is a simple, reusable, professional tool for open houses. It costs less than printed materials over time, looks better than a laptop, and requires zero attention once you plug it in. Load your best listing photos, set it on the counter, and let it sell.
The open-house kit
Paid links. We may earn a commission at no extra cost to you.
- See today's price on Amazon
SanDisk 64GB Ultra USB 3.0 flash drive
Load the photos on this, plug it into the frame, and it plays with no internet at all.
- See today's price on Amazon
SanDisk 64GB Ultra SDXC card
Some frames take an SD card instead of a USB stick. Check which slot yours has.
- See today's price on Amazon
Acer USB-C SD card reader
You need this to copy photos onto the card from a phone or a laptop with no card slot.
- See today's price on Amazon
D-Line paintable cord cover kit
A wall-mounted frame still needs power. This hides the cable and takes paint.
Frames we recommend for this
Current models only. Prices are shown on Amazon, not here.
 Aluratek 10" WiFi
10" · 1280x800 · 32 GB built-in storage storage
The cheapest touchscreen WiFi frame worth buying. Best for people who want simple, local storage without cloud subscriptions.
Check Price Dragon Touch Classic 10"
10" · 1280x800 · 32 GB built-in storage storage
The best budget frame with both WiFi and a touchscreen. A smart buy if you want offline options too.
Check Price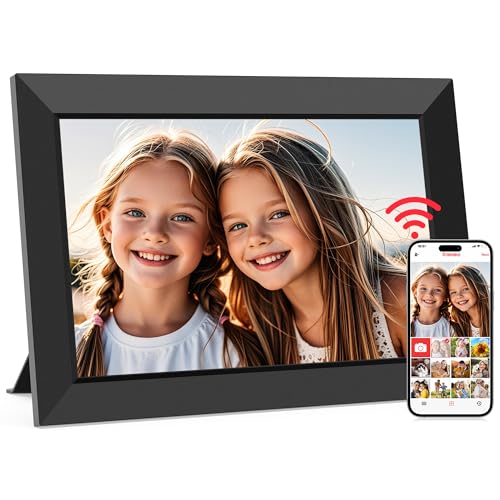 Frameo 10.1"
10.1" · 1280x800 · 32 GB built-in storage storage
The best digital frame under $100. If budget is your top concern, start here.
Check PricePaid links. We earn a commission if you buy, at no cost to you.
DigitalPictureFrames.com
Written by the editorial team at Anvil Road LLC. We research digital frames against manufacturer documentation so you get honest, sourced advice.